This awesome castle scene is a collaboration from "Panzy-boe" And "Finland Brick" of Flickr.
They displayed it at the Model Expo 2013 in Helsinki Finland.
It's great to see such neat castle scenes from two very talented builders! :)
Check it out on Flickr!
Saturday, April 27, 2013
Battle of Amroth
Tuesday, April 23, 2013
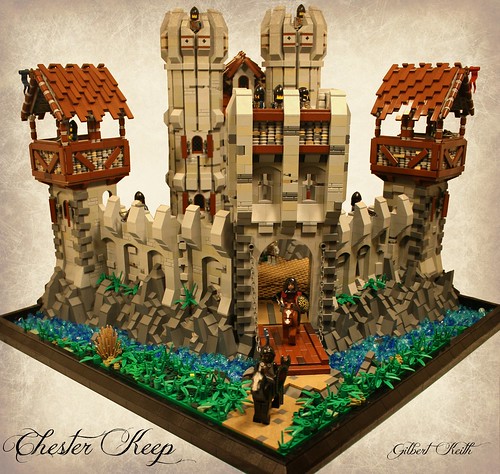
Chester Keep
I really like the look of this castle by Gilbert_Keith on Flickr.
The different types of towers and sweet details throughout make this build a must see! :)
Check it out on Flickr!
The different types of towers and sweet details throughout make this build a must see! :)
Check it out on Flickr!
Thursday, April 18, 2013
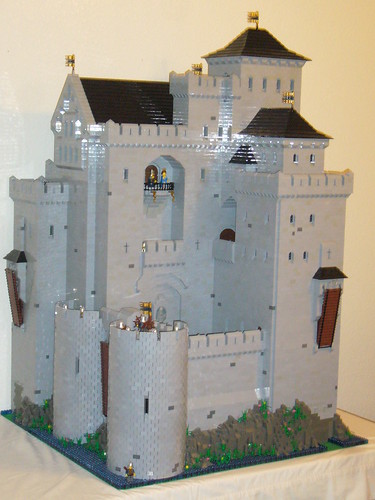
A Huge Keep
Now this is an awesome castle MOC!
The sheer size and realism is amazing!
And the interior is just as cool as the outside!
Check out the set on Flickr! :)
The sheer size and realism is amazing!
And the interior is just as cool as the outside!
Check out the set on Flickr! :)
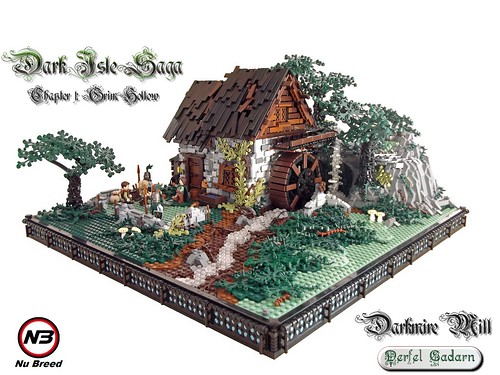
Darkmire Mill
Derfel Cadarn presents his usual amazingly detailed build that is a sight to behold!
The dark and weather beaten feel is superb!
Check it out on Flickr! :)
Wednesday, April 10, 2013
Deer, Elk, Pronghorn and Goat instructions
Recently, a friend of mine posted a link of my Musk Ox instructions on a Flickr group. He also posted a picture of my Elk, and said... "I hope you can figure out how it's made from the picture."
This quickly inspired me to write a good tutorial for one of favorite animals. :)
First I'd like to start with the Billy-goat.
This animal is pretty simple.
first you'll need a 1x1 brick with studs on all sides, and one normal 1x1 brick placed on one side.
Next add three 1x2 grill plates as shown.
Next add a 1x1 round plate to the end.
then attach a pair of binoculars on the 1x1 round plate.
Then add a nice set of horns to the "head" I used Brickwarriors crescent horns , but LEGO ones work fine too. :)
And that's it for the goats!
Next i'll show you how to make the deer or I personally call them "Doose"
(Half deer, half moose)
First you'll need two 1x1 bricks with studs on all sides and one 1x1 Technic brick.
Then you put them together as shown.
Next add a 1x3 plate on the side.
Then add another 1x3 tile to the other side and a 1x1 slope (cheese slope) on the front.
Next I'll add a 1x4 plate to the top.
Don't forget to add a 1x1 clamp on the back. (so you can attach the tail later)
Then add a cheese slope where shown.
Next add a 1x1 plate and a 1x1 round plate top, on the front, as shown.
Then we'll build the legs
Each pair has a jumper plate followed by a pair of 1x1 rounds, a pair of 1x1 cones, and another pair of 1x1 round plates on the end.
Then attach them as shown.
Next the tail, I used a Brickwarriors spike, but again, a LEGO claw would work fine. ;)
Finally the head! I've always used a Brickwarriors Minotaur head and a set of Brickwarriors antlers.
I've found these much more effective then brick-built heads at this scale.
This same format can be used to create the Elk and the Pronghorn as well, with a few minor color and piece changes. :)
Hope this is useful, thank you for viewing!
-Bro Steven
Monday, April 8, 2013
Featured Builder- nate_decastro
nate_decastro's photostream on Flickr.
I've been following Nathan's photostream for awhile now, and I can hardly believe the incredible ships that pop up in my contacts page! This guy is undoubtedly one of the best spaceship builders out there!
But his talent is not limited to just spacecraft, his mechs and robots are excellent as well!
Check out his amazing creations on Flickr! :)
Subscribe to:
Comments (Atom)


