This post will show you how to make a fierce armored war elephant.
First, we need an elephant. I use a standard LEGO elephant. (Although, eventually I want to try my hand at a brick-built one.)
Next, I'll add two brackets, and one 2x2 plate to the back of the elephant.
This will provide a good attachment point for the side armor pieces.
Then, I'm going to add one 2x4 plate and one 2x6 plate as shown.
These will provide a stable base for the platform that goes on top at the end.
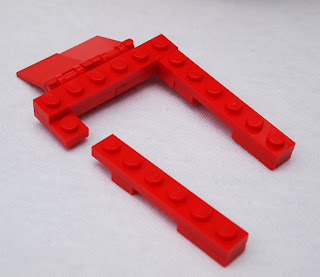
Next, I'll start working on the sides. I used two 3x3 wedge plates with one 2x4 plate connected as shown below.
This three part combo fits very nicely on the brackets.
Repeat this step so that we have two sides to the armor. ;)
Next, I'll finish the sides.
I used two 4x6 plates.
Now, anybody can stick two plates on the side of an elephant, so I decorated these with lots of gold and red pieces to make it look like scaly armor.
As you can see I've used a few simple patterns to get just the right look.
And it snaps right on the side as shown.
Make the inverse of this so that both sides protect the elephant from enemy weapons.
It's starting to look like a mighty beast of war! ;)
But, we need a nice place for the knights and warriors to stand on top, so...
I'll add a 4x6 plate right on top of the elephant's back.
Next, I'll get two handle bar plates with two clip on flags, plus one 1x6 plate and two 1x2 plates.
And attach them like so...
Next,I'll get two more 1x6 plates with 1x1 plates and 1x2 plates added underneath these as shown.
Then, I'll attach these to the previous combo.
And this will provide the framework for the box/platform thing that the riders go in. ;)
And it sets very nicely right on top.
Then I'll get a 2x8 plate...
...And decorate the studded side with gold and red pieces.
I'll need an inverted (pointing up) bracket with a 1x2 plate (it doesn't have to be smooth.)
Next, just snap it on the framework.
Again, make a duplicate and attach it on the other side.
And then make one more substituting the 2x8 plate with a 2x6 plate.
With two 1x2 plates to fill the cracks. ;)
Next, I'm going to add some head protection...
It was starting to look empty around there.
Two headlight bricks make a easy attachment point.
And I'll add some cheese slopes for extra detail.
Next, I added some clip plates and plumes to add a regal flare.
And one 1x2 plate.
Next, add a 2x3 plate with some gold pieces on top.
...Aaaannnnddd we're almost done! But his tusks aren't quite sharp enough... ;)
So, we'll get a few golden spikes two for the tusks and one for the headdress.
Two cones do a great job of keeping the spikes in place.
Ta-da! You've got yourself an awesome armored war elephant! :D
Of course, he needs some brave knights to ride into battle on his back! ;)
And now you're ready to crush your way through the toughest battlefields and ride back without a scratch. :)
Thanks for reading this tutorial! If you have any questions or comments, there's a comment box just below.


Now I just need an elephant :/
ReplyDeleteSame here, I need an elephant now. I wish Lego would still put'em in sets
ReplyDeleteRealy fantastic
ReplyDeleteI used a mammoth
ReplyDeleteWow! This is really cool; but the only impostoant thing that i need is the elephant :/
ReplyDeletenext time you should add a picture at the top for what and how many pieces we need.
ReplyDelete